

Every kitchen has a center of gravity, and when there’s an island, everyone ends up orbiting it. Homework, morning coffee, the friend who “just came in to chat” while you’re trying to dice an onion: the island collects them all.
That’s why modern IKEA kitchen island ideas deserve more thought than “put a big box in the middle.” Built from SEKTION cabinets, an island can be a storage powerhouse, a breakfast bar, or both, sized to your room rather than to a catalog. The best one matches how your household actually uses the kitchen. If storage is the priority, deep drawers may beat stools. If dinner happens at the counter more nights than not, the overhang is the investment.
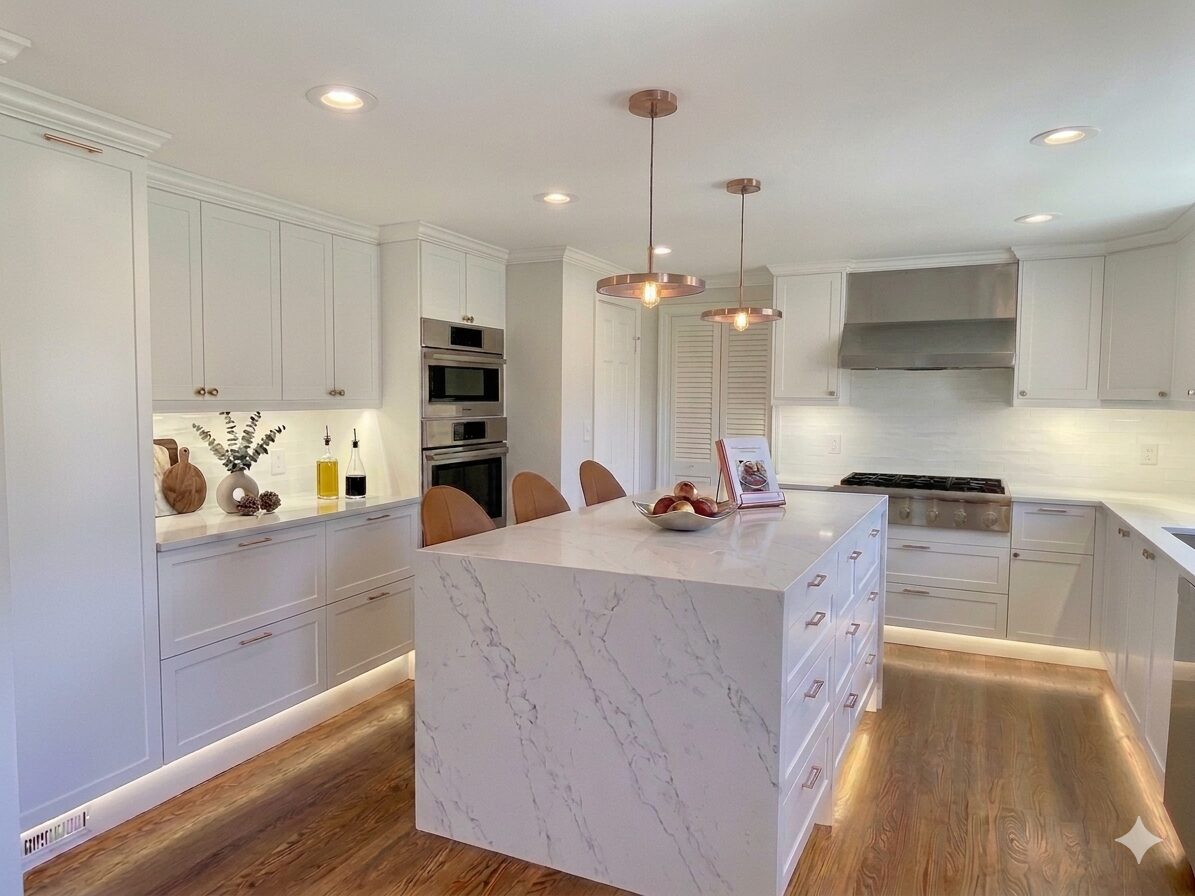
Why Choose an IKEA Kitchen Island?
Because you can build exactly the island your room can handle. SEKTION frames, drawers, fronts, panels and countertops combine into compact islands for tight kitchens and generous ones for open plans, and the island can match the perimeter cabinets or deliberately go its own way.
One installer’s note before the fun part: an island has no wall to hang from, so it can’t use the suspension rail that holds up the rest of a SEKTION kitchen. It gets anchored to the floor instead, and IKEA makes a floor anchoring frame for exactly that job, with adjustable feet to level it on uneven floors.
Benefits of a Modern Kitchen Island
A good island multitasks. It can give you:
- More storage, often the most accessible in the kitchen
- Extra countertop for prep, baking and buffet-style serving
- Seating for breakfast, homework and guests who want to hang out
- A home for appliances like a dishwasher, microwave drawer or wine fridge
- A soft divider between the kitchen and the living area
What it shouldn’t be is a big box that fills a gap. Its size and setup have to support the way people move through the room.
1. Add Deep Drawers for Everyday Storage
If you take one idea from this list, take this one. Deep drawers turn an island into the most useful storage in the kitchen. Pots, pans, plates, mixing bowls, and food containers all fit, and when the drawer opens, you see everything from above, which beats crouching with a flashlight.
Give each drawer a job: cookware in one, baking gear in another, everyday dishes in a third. IKEA’s MAXIMERA drawers extend fully, and dividers and inserts keep the container lids from staging their usual avalanche.
2. Create a Kitchen Island With Seating
Add stools and the island becomes the social hub of the kitchen: breakfast before school, homework after it, a friend perched with a glass of wine while you cook. In plenty of homes, it ends up being the most-used seat in the house.
Choosing the Right Island Seating
Comfort comes down to knee space and elbow room. The National Kitchen & Bath Association recommends 24 inches of width per seat, plus 15 inches of clear knee space at a standard 36-inch counter (12 inches at 42-inch bar height). Choose stools that match the counter height, ideally with a footrest.
Then mind the traffic behind the stools. NKBA guidelines call for 36 inches from the counter edge to a wall if people need to edge past someone seated, and 44 inches if they need to walk past. Stools parked in the route to the fridge turn dinner into an obstacle course.

3. Use an IKEA Island for Extra Pantry Storage
An island makes a great secondary pantry. Drawers and cabinets on the kitchen side can hold dry goods, snacks, serving pieces, and the small appliances you use weekly but don’t want living on the counter.
This is especially useful in kitchens short on wall space. Skip the extra upper cabinets and let the island carry the load, and keep the everyday stuff at waist height where it’s easy to grab.
4. Design a Two-Sided Kitchen Island
A two-sided island does a different job on each face. The kitchen side gets drawers and cabinets for cooking gear. The other side gets seating, shallower storage for placemats and board games, or shelves for cookbooks.
In open-plan homes, the outward face is the one guests see, so treat it like furniture. Finished panels, a deliberate color, and good hardware make the back of an island look like the front of a sideboard.
5. Add an Island With a Breakfast Bar
A breakfast bar turns the island into the everyday table for coffee, cereal, quick lunches, and the snacks someone swears are not dinner. Extend the countertop past the cabinets to create the knee space.
Overhangs need support. Stone and quartz have limits on how far they can cantilever, and a full 15-inch seating overhang often calls for brackets or hidden steel supports. Your fabricator will tell you where the line is for your material and thickness.
6. Combine Open Shelving With Closed Cabinets
Mixing open shelves with closed storage makes an island more interesting to look at. Cabinets hide the blender and the bulk rice, while open shelves show off cookbooks, serving bowls, or a row of baskets.
Use open shelving with restraint. Anything on it collects dust and a light film of kitchen grease, so reserve it for things you use often or can toss in the dishwasher.
7. Create a Large Island for Meal Preparation
In a roomy kitchen, a big island can become the main prep zone, with space to chop, roll out dough, assemble a lasagna, and lay out a buffet.
Bigger isn’t automatically better, though. An island that’s too long turns every trip from fridge to sink into a lap. Keep it in proportion with the room and the work aisles around it. The NKBA recommends at least 42 inches of aisle for one cook and 48 inches when two or more people cook together.
8. Add Appliances to an IKEA Kitchen Island
Depending on your layout and local code, an island can hold a cooktop, sink, dishwasher, microwave drawer, or wine fridge. Each one adds function, and each one adds planning.
Island appliances need power, and some need water, drainage or ventilation too, which usually means running lines through the floor or ceiling. Countertop cutouts and clearances have to be exact. Outlet rules for islands also changed in the 2023 National Electrical Code, and areas adopt code updates on their own timelines, so let your electrician spell out what applies where you live. Settle appliance locations before the island cabinet plan is final.
9. Use Contrasting Cabinet Colors
A contrasting island is the easiest way to give a kitchen a focal point. Pale perimeter cabinets with a deep green, navy, or charcoal island add depth without any complicated design moves. Wood fronts on the island bring warmth to an otherwise all-white or all-gray kitchen.
Prefer calm? Match the island to the perimeter for a continuous, built-in look. Both approaches work. The choice is whether you want the island to be the star or part of the chorus.
10. Add Lighting Above the Kitchen Island
Pendants do two jobs over an island: they light the work, and they’re the first thing anyone notices. A common rule of thumb is to hang them 30 to 36 inches above the countertop, and to scale their number and size to the island’s length so they don’t crowd it.
Watch sightlines and glare, especially over glossy counters. Pendants that block the view across the room or bounce light into your eyes get old fast. If the island is your main prep zone, back the pendants up with recessed lights so you’re not chopping in your own shadow.
IKEA Kitchen Island Dimensions and Clearance
The room sets the island’s size. You need space for cabinet doors and drawers to open, for appliance doors to drop, and for people to pass.
Use the NKBA numbers as your floor: 42-inch work aisles for one cook, 48 inches for two, 36 inches for walkways, and more behind seating. A huge island with skinny aisles looks great on a floor plan and feels like rush hour in real life.
Before ordering cabinets or a countertop, outline the island’s footprint on the floor in painter’s tape. Open the oven and dishwasher doors to see where they land, then walk the route with a full laundry basket. If it feels tight now, it’ll feel tighter with stools.
How Much Does an IKEA Kitchen Island Cost?
The price depends on the cabinet configuration, the number of drawers, the fronts, countertop, hardware, seating overhang, panels, lighting, and appliances. A storage-only island is the simplest and least expensive. Add a sink, cooktop or dishwasher, and the plumbing, electrical, and fabrication costs climb.
Island feature | Cost impact |
Basic cabinet storage | Lower |
Multiple deep drawers | Moderate |
Premium countertop | Moderate to high |
Seating overhang and supports | Moderate |
Finished panels on exposed sides | Moderate |
Plumbing or electrical work | Project-dependent |
Built-in appliances | Higher |
Common IKEA Kitchen Island Planning Mistakes
The most common one is designing for looks over function. A beautiful island can still drive you up the wall if its drawers block the walkway or the stools sit in the path to the fridge.
Another is fuzzy storage planning. Decide what the island will hold before you pick fronts, then choose drawers and cabinets to fit those things.
People also forget outlets and lighting. If you’ll prep, run a mixer or charge phones at the island, plan the power during design, before the countertop goes down.
Finally, confirm the countertop support for any overhang, especially a generous one. Gravity always gets a vote.
Build the Island Your Kitchen Actually Needs
The best modern IKEA kitchen island ideas combine storage, seating, prep space and good looks in one hardworking piece of furniture. Deep drawers handle the cookware, cabinets add pantry space, and an overhang turns the island into the place everyone eats breakfast.
Start with purpose. Then measure clearances and plan utilities and seating before you choose finishes. Do that, and the island stops being a centerpiece and becomes the place the whole kitchen runs from.
Planning an island and want help with the clearances, the countertop, and the install? Book your free consultation with Hive Kitchen Remodeling.
FAQs About IKEA Kitchen Islands
1. Can IKEA cabinets be used to build a kitchen island?
Yes. SEKTION base cabinets, drawers, fronts, cover panels and countertops can be combined into islands of almost any length. Because an island can’t hang on the wall rail like the rest of the kitchen, it needs to be anchored securely to the floor, and IKEA sells a floor anchoring frame for that purpose.
2. How much storage can an IKEA kitchen island provide?
A lot, depending on its size and setup. Deep drawers, standard cabinets and organizers can hold cookware, dishes, pantry goods and small appliances, and a two-sided design adds shallow storage on the seating side. Drawers usually make the most of the space.
3. Can an IKEA kitchen island include seating?
Yes. Extend the countertop to create an overhang, allowing about 24 inches of width per stool and 15 inches of knee space at standard counter height. Stone and quartz overhangs that deep often need brackets or hidden supports, so confirm with your fabricator.
4. Can I put a sink or cooktop in an IKEA island?
Yes, with planning. A sink needs water and drain lines run to the island, and a cooktop needs power or gas plus ventilation. Both need precise countertop cutouts. Settle appliance locations and utility routes before the island design is final, and use licensed trades where code requires.
5. What makes an IKEA kitchen island look modern?
Simple slab or slim-frame fronts, minimal hardware, a clean countertop edge, good lighting, and a restrained palette. A contrasting island color or wood fronts can make it the focal point, while finished end panels help it read as furniture rather than a row of cabinets.


